Sponsored

  • Why LED Lights Are The Eco-Friendly Choice

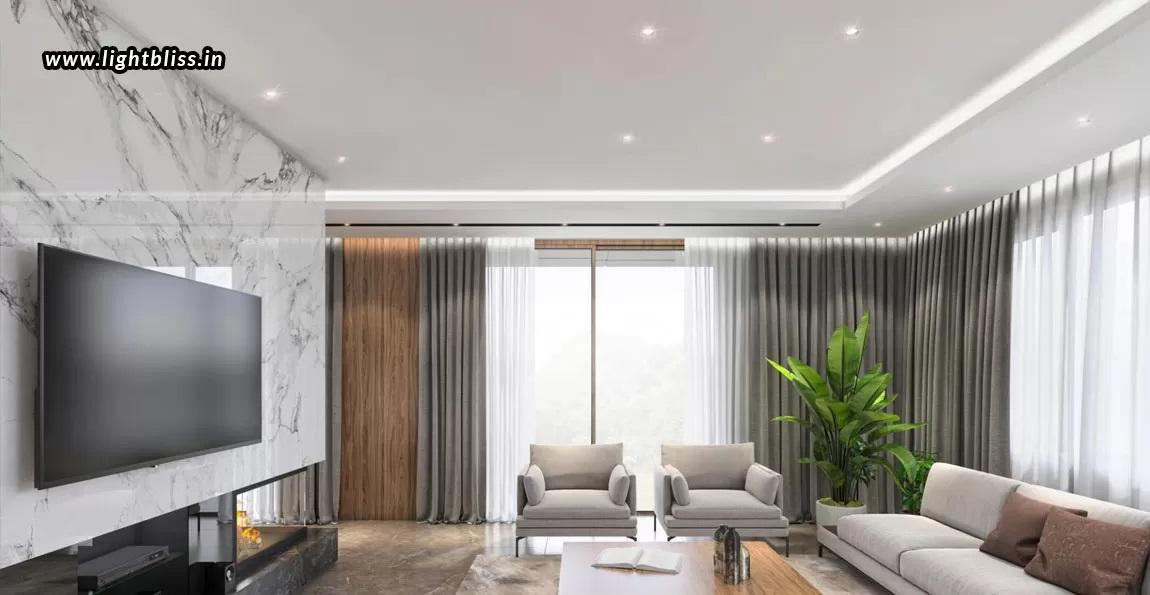
    Discover the eco-friendly benefits of LED lights for energy efficiency and cost savings, learning how LED lighting Ahmedabad is revolutionizing the lighting industry for a brighter, greener future.

    Read more: https://bit.ly/4aN3my2

    #LEDLights #LEDLightsAhmedabad #LightingAhmedabad #LuminacDistributorAhmedabad #LuminacLights #LEDArchitecturalLightingDealers #LightBliss
    Why LED Lights Are The Eco-Friendly Choice Discover the eco-friendly benefits of LED lights for energy efficiency and cost savings, learning how LED lighting Ahmedabad is revolutionizing the lighting industry for a brighter, greener future. Read more: https://bit.ly/4aN3my2 #LEDLights #LEDLightsAhmedabad #LightingAhmedabad #LuminacDistributorAhmedabad #LuminacLights #LEDArchitecturalLightingDealers #LightBliss
    1
    0 Comments 0 Shares
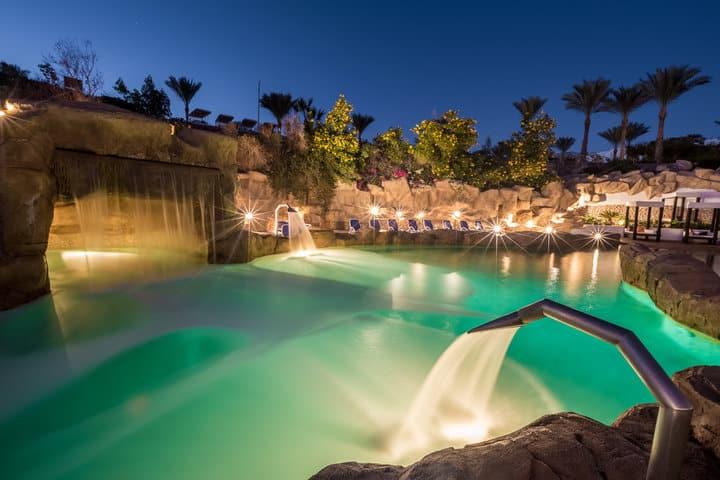
  • How To Seal Pool Light Cable?
    If you have a swimming pool, installing pool lights is a popular choice to enhance its beauty and illuminate it during the night. However, since pool lights operate in water, sealing the pool light cables properly is crucial to prevent any potential hazards like short circuits or electrical shocks. So, what should you do to seal the cable?
    >>> See more A Comprehensive Guide to Cutting LED Strip Lights at: https://band.us/band/90424574/post/31

    Before You Seal, Prepare the Necessary Tools and Materials

    To ensure a smooth process, make sure to gather all the required tools and materials. Here's a list to prevent any omissions:

    Screwdriver: To open the housing of the pool light and disconnect the cable connection.
    Utility knife or wire cutter: To cut the cable.
    Soldering iron: For soldering the wires.
    New cable ties: To secure the cables together.
    Waterproof connector or cable gland: To create a secure and waterproof connection at the entry point.
    Waterproof sealant: Applied to the cable entry point and any exposed cable connections to further prevent water intrusion.
    Caulking gun: To apply the sealant.
    Multimeter: To check for electrical leakage.

    After gathering the necessary tools and materials, the next step is to clean the cable channel, cable entry, and exit. Cleaning these areas before the sealing work reduces unnecessary difficulties.

    Let's Begin the Sealing Process
    The First Thing You Do Is to Turn Off the Power to the Pool

    Locate the power distribution box in your home, find the switch that controls the power to the pool, and switch it off. After turning it off, verify that the power to the pool is indeed off by attempting to turn on the pool light. If the light doesn't turn on, it means you have successfully turned off the power to the pool. If the light turns on, you need to be cautious. Once you identify the issue, fix it and confirm again. Then, you can proceed to the next step.

    If the circuit identification in the distribution box is unclear, you cannot determine which one supplies power to the pool. In that case, the safest way is to turn off the main power, confirm it is off, and then proceed with the other work.
    >>> See more Linear Lux: A Comprehensive Guide to Dimming Constant Voltage LED Strip Lights at: https://www.flickr.com/photos/bestledlightstripsblls/53399222568

    Step 1: Open the Housing of the Pool Light Cable

    Use a screwdriver to open the housing of your pool light and remove the inner body of the light to expose the pool light cable. You can use a flathead screwdriver to loosen the housing of the pool light with a little force. If you are doing this for the first time, you may need to give it a few tries. After a few attempts, you will find that it's easy. Once you have unscrewed it, separate the light from the pool light cable.

    Step 2: Disconnect the Cable Connection

    Now, you need to remove the pool light cable from the other end. Use a screwdriver to carefully disconnect it. Then, pull the pool light cable out of the conduit.

    Step 3: Cut the Cable

    Use a utility knife or wire cutter to cut the cable. Be sure to cut the insulation sheath, not the internal wires. Focus on cutting and avoid cutting the wires inside.

    Step 4: Separate the Cable Ties

    If there are multiple wires tied together with cable ties, you need to separate them. Separating the cable ties will help you easily identify and connect each wire to the power or pool light during the sealing work.

    Step 5: Solder the Wires

    Soldering the wires should be done in this step. Bring each wire to its corresponding connector. Soldering the wires provides a good electrical connection, ensuring smooth operation of the pool lights.

    Step 6: Put It Back Together

    After soldering the wires, use a new cable tie to secure the cables. It should not be too loose or too tight. Being too loose can cause water ingress, while being too tight can put strain on the wires.

    Step 7: Create a Waterproof Connection

    When connecting the cable, use a waterproof connector or cable gland to create a secure and waterproof connection at the entry point. Also, apply waterproof sealant at the cable entry point and any exposed cable connections to further prevent water intrusion.

    Step 8: Reinstall

    Now, it's time for the final step. Place the pool light cable back into the conduit. Use the caulking gun to fill the sealant and wait a moment to see if it is secure. If the housing of the pool light is not loose in the pool light cable, you can install it.

    Don't forget to check for electrical leakage with a multimeter.
    Everything is now in order. Turn on the power to your pool and enjoy your swimming experience.
    >>> See more Wiring Design for Addressable LED Strips at: https://www.besport.com/post/44548625
    How To Seal Pool Light Cable? If you have a swimming pool, installing pool lights is a popular choice to enhance its beauty and illuminate it during the night. However, since pool lights operate in water, sealing the pool light cables properly is crucial to prevent any potential hazards like short circuits or electrical shocks. So, what should you do to seal the cable? >>> See more A Comprehensive Guide to Cutting LED Strip Lights at: https://band.us/band/90424574/post/31 Before You Seal, Prepare the Necessary Tools and Materials To ensure a smooth process, make sure to gather all the required tools and materials. Here's a list to prevent any omissions: Screwdriver: To open the housing of the pool light and disconnect the cable connection. Utility knife or wire cutter: To cut the cable. Soldering iron: For soldering the wires. New cable ties: To secure the cables together. Waterproof connector or cable gland: To create a secure and waterproof connection at the entry point. Waterproof sealant: Applied to the cable entry point and any exposed cable connections to further prevent water intrusion. Caulking gun: To apply the sealant. Multimeter: To check for electrical leakage. After gathering the necessary tools and materials, the next step is to clean the cable channel, cable entry, and exit. Cleaning these areas before the sealing work reduces unnecessary difficulties. Let's Begin the Sealing Process The First Thing You Do Is to Turn Off the Power to the Pool Locate the power distribution box in your home, find the switch that controls the power to the pool, and switch it off. After turning it off, verify that the power to the pool is indeed off by attempting to turn on the pool light. If the light doesn't turn on, it means you have successfully turned off the power to the pool. If the light turns on, you need to be cautious. Once you identify the issue, fix it and confirm again. Then, you can proceed to the next step. If the circuit identification in the distribution box is unclear, you cannot determine which one supplies power to the pool. In that case, the safest way is to turn off the main power, confirm it is off, and then proceed with the other work. >>> See more Linear Lux: A Comprehensive Guide to Dimming Constant Voltage LED Strip Lights at: https://www.flickr.com/photos/bestledlightstripsblls/53399222568 Step 1: Open the Housing of the Pool Light Cable Use a screwdriver to open the housing of your pool light and remove the inner body of the light to expose the pool light cable. You can use a flathead screwdriver to loosen the housing of the pool light with a little force. If you are doing this for the first time, you may need to give it a few tries. After a few attempts, you will find that it's easy. Once you have unscrewed it, separate the light from the pool light cable. Step 2: Disconnect the Cable Connection Now, you need to remove the pool light cable from the other end. Use a screwdriver to carefully disconnect it. Then, pull the pool light cable out of the conduit. Step 3: Cut the Cable Use a utility knife or wire cutter to cut the cable. Be sure to cut the insulation sheath, not the internal wires. Focus on cutting and avoid cutting the wires inside. Step 4: Separate the Cable Ties If there are multiple wires tied together with cable ties, you need to separate them. Separating the cable ties will help you easily identify and connect each wire to the power or pool light during the sealing work. Step 5: Solder the Wires Soldering the wires should be done in this step. Bring each wire to its corresponding connector. Soldering the wires provides a good electrical connection, ensuring smooth operation of the pool lights. Step 6: Put It Back Together After soldering the wires, use a new cable tie to secure the cables. It should not be too loose or too tight. Being too loose can cause water ingress, while being too tight can put strain on the wires. Step 7: Create a Waterproof Connection When connecting the cable, use a waterproof connector or cable gland to create a secure and waterproof connection at the entry point. Also, apply waterproof sealant at the cable entry point and any exposed cable connections to further prevent water intrusion. Step 8: Reinstall Now, it's time for the final step. Place the pool light cable back into the conduit. Use the caulking gun to fill the sealant and wait a moment to see if it is secure. If the housing of the pool light is not loose in the pool light cable, you can install it. Don't forget to check for electrical leakage with a multimeter. Everything is now in order. Turn on the power to your pool and enjoy your swimming experience. >>> See more Wiring Design for Addressable LED Strips at: https://www.besport.com/post/44548625
    0 Comments 0 Shares
  • Green Pool Problems: How to Clean a Green Pool Fast

    A clean and sparkling pool is the dream of every pool owner. However, when you find your once-clear water has turned a murky green, it can be frustrating. The culprit behind this greenish hue is most likely green algae. In this article, we will explore the reasons behind a green pool and provide you with step-by-step instructions on how to restore its clarity.

    >>> See More Can You Use Smart Bulbs In Ceiling Lights at https://www.flickr.com/photos/bestledlightstripsblls/52780416811

    Why Is My Pool Green?

    Green algae can quickly take over your pool due to several factors. Here are the main culprits:

    Heavy Rains

    If your area has experienced heavy rainfall recently, it could be the cause of your green algae problems. The additional rainwater alters the chemical balance of your pool, making it more susceptible to bacteria and algae growth.

    Heat Waves

    Warm water creates the perfect breeding ground for algae. During a heat wave, it is crucial to keep a close eye on your pool and adhere to a regular cleaning schedule to prevent algae growth.

    Water Circulation Problems

    Proper circulation is essential for maintaining a clean pool. Stagnant water provides an opportunity for algae, bacteria, and other contaminants to take hold and turn your pool green. Ensure your pool pump is clean, in good condition, and consistently running to keep the water flowing.

    Lack of Maintenance: Cleaning & Chemistry

    Neglecting your pool maintenance duties is a recipe for disaster. As a pool owner, it is your responsibility to keep the water clean and free of algae through regular maintenance. This includes vacuuming, brushing, water testing, and chemical balancing.

    Non-Algae Cause: Copper Ions

    High levels of copper in your pool water can cause it to turn green. An imbalance in the chemical composition of your pool can lead to various problems. Regular testing and balancing can help you avoid these issues.

    >>> See More How To Cut LED Strip And Reconnect at https://bestledlightstripsblls.blogspot.com/2023/03/how-to-cut-led-strip-and-reconnect.html

    Steps for Cleaning a Green Pool

    If you are facing a green algae problem in your pool, it is crucial to act quickly before the situation worsens. Follow these step-by-step instructions to restore your pool's brilliance:

    1. Brush & Vacuum

    Start by brushing every inch of your pool with a suitable brush for your pool type (nylon bristle for fiberglass pools and steel bristle for concrete pools). Scrub the stairs, walls, and hard-to-reach corners to loosen the accumulated algae. Then, thoroughly vacuum the pool, making multiple passes if necessary.

    2. Test Alkalinity & pH

    Next, test the alkalinity and pH levels of your water. Alkalinity measures the water's resistance to pH level changes, while pH levels indicate the water's acidity. When properly balanced, these chemicals work continuously to keep your pool clean and safe. Adjust the levels accordingly, aiming for a pH range of 7.2-7.8 and alkalinity between 80-120 PPM.

    3. Double or Triple Shock the Pool

    Regularly shocking your pool is essential for maintaining its cleanliness. Double or triple shock the pool to combat green algae. This process involves adding chemicals to balance the water and raise the free chlorine levels. Follow the instructions on the package carefully while wearing protective equipment.

    4. Run the Pool Filter

    After shocking the pool, turn on the pool filter. This will collect and remove dead algae and other contaminants, leaving you with clearer water.

    5. Repeat Until Clear

    If, after following these steps, your water still appears green or cloudy, repeat the entire process until the water is clear and no traces of algae remain.

    >>> See More Is Your Dimmer Switch Causing Flickering When Off at https://biztime.com.vn/post/761853_is-your-dimmer-switch-causing-flickering-when-off-if-you-have-ever-noticed-your.html
    Green Pool Problems: How to Clean a Green Pool Fast A clean and sparkling pool is the dream of every pool owner. However, when you find your once-clear water has turned a murky green, it can be frustrating. The culprit behind this greenish hue is most likely green algae. In this article, we will explore the reasons behind a green pool and provide you with step-by-step instructions on how to restore its clarity. >>> See More Can You Use Smart Bulbs In Ceiling Lights at https://www.flickr.com/photos/bestledlightstripsblls/52780416811 Why Is My Pool Green? Green algae can quickly take over your pool due to several factors. Here are the main culprits: Heavy Rains If your area has experienced heavy rainfall recently, it could be the cause of your green algae problems. The additional rainwater alters the chemical balance of your pool, making it more susceptible to bacteria and algae growth. Heat Waves Warm water creates the perfect breeding ground for algae. During a heat wave, it is crucial to keep a close eye on your pool and adhere to a regular cleaning schedule to prevent algae growth. Water Circulation Problems Proper circulation is essential for maintaining a clean pool. Stagnant water provides an opportunity for algae, bacteria, and other contaminants to take hold and turn your pool green. Ensure your pool pump is clean, in good condition, and consistently running to keep the water flowing. Lack of Maintenance: Cleaning & Chemistry Neglecting your pool maintenance duties is a recipe for disaster. As a pool owner, it is your responsibility to keep the water clean and free of algae through regular maintenance. This includes vacuuming, brushing, water testing, and chemical balancing. Non-Algae Cause: Copper Ions High levels of copper in your pool water can cause it to turn green. An imbalance in the chemical composition of your pool can lead to various problems. Regular testing and balancing can help you avoid these issues. >>> See More How To Cut LED Strip And Reconnect at https://bestledlightstripsblls.blogspot.com/2023/03/how-to-cut-led-strip-and-reconnect.html Steps for Cleaning a Green Pool If you are facing a green algae problem in your pool, it is crucial to act quickly before the situation worsens. Follow these step-by-step instructions to restore your pool's brilliance: 1. Brush & Vacuum Start by brushing every inch of your pool with a suitable brush for your pool type (nylon bristle for fiberglass pools and steel bristle for concrete pools). Scrub the stairs, walls, and hard-to-reach corners to loosen the accumulated algae. Then, thoroughly vacuum the pool, making multiple passes if necessary. 2. Test Alkalinity & pH Next, test the alkalinity and pH levels of your water. Alkalinity measures the water's resistance to pH level changes, while pH levels indicate the water's acidity. When properly balanced, these chemicals work continuously to keep your pool clean and safe. Adjust the levels accordingly, aiming for a pH range of 7.2-7.8 and alkalinity between 80-120 PPM. 3. Double or Triple Shock the Pool Regularly shocking your pool is essential for maintaining its cleanliness. Double or triple shock the pool to combat green algae. This process involves adding chemicals to balance the water and raise the free chlorine levels. Follow the instructions on the package carefully while wearing protective equipment. 4. Run the Pool Filter After shocking the pool, turn on the pool filter. This will collect and remove dead algae and other contaminants, leaving you with clearer water. 5. Repeat Until Clear If, after following these steps, your water still appears green or cloudy, repeat the entire process until the water is clear and no traces of algae remain. >>> See More Is Your Dimmer Switch Causing Flickering When Off at https://biztime.com.vn/post/761853_is-your-dimmer-switch-causing-flickering-when-off-if-you-have-ever-noticed-your.html
    0 Comments 0 Shares
  • What Causes Green Pool Water & How to Fix It
    Is your pool water turning green? Don't worry, you're not alone. Green pool water can be a frustrating problem for any pool owner. Fortunately, there are several factors that can cause the water to turn green, and solutions to fix it.
    >>> See more Eye-Safe Lighting - Understanding the Effects of LED Light at: https://band.us/band/90424574/post/16
    Understanding Green and Cloudy Pool Water

    If your pool water is both green and cloudy, it's likely an issue with algae. Algae can persist in a pool even after shocking it. A green pool, especially one that turned green overnight or after heavy rain, can also be caused by a pool pump not circulating water properly or a problem with your filtration system.

    Green Tint, but Clear Pool Water

    If your pool water has a green tint but is otherwise clear, it could be due to pollen, chlorine-resistant algae, or most commonly, a high pH level. When a pool's pH level exceeds 7.8, even high levels of chlorine cannot disinfect it effectively. This leads to metals in the water and pool components oxidizing, resulting in a greenish hue.

    How to Fix a Green Pool

    In most cases, you can fix a green pool by shocking it. To properly clean green pool water, you'll need to thoroughly clean the pool tiles, filters, and equipment, add shock treatment and algaecides, and balance the pool water. The entire process of fixing a green pool usually takes a few days.
    >>> See more The fascination with LED lights at: https://hub.docker.com/r/bestledlightstripsblls/are-led-lights-bad-for-eyes

    Follow these steps to know how to fix a cloudy green pool:

    Test and balance the pool water again. Pay special attention to the pH, alkalinity, and chlorine/disinfectant levels. Low chlorine levels will lead to future algae growth and the return of a green pool. Remember that properly balanced pH and alkalinity levels ensure that your chlorine can work as it should.
    Monitor your pool water daily. Ensure that your chlorine levels are adequate. Consider adding ARM & HAMMER™ Clear Balance™ Pool Maintenance Tablets to your pool care routine to help maintain balanced pH and alkalinity levels and support your chlorine.

    If you're wondering if you can swim in a green pool, it depends, but probably not. Dark, cloudy green pool water indicates an algae infestation, bacterial contamination, and compromised filtration. If your pool water is green, murky, or slimy, it's best to avoid swimming in it.

    If you're working hard to clean your green pool but it still has a greenish tint, test your pool water for bacteria, chlorine, and pH levels. If they're within normal limits and you only have patches of algae or a light green tint, it may be safe to swim in the water while it continues to clear up.

    Frequently Asked Questions
    1. Why is my pool water green?

    Pool water can turn green due to algae overgrowth, low chlorine levels, a pH level higher than 7.8, excessive pollen in the water, poor water circulation, a malfunctioning filter, or a combination of these factors.

    2. Can I swim in a green pool?

    It depends on the condition of the pool water. If the water is green, cloudy, or slimy, it's best to avoid swimming in it. However, if the water only has a slight green tint and the water parameters are within normal limits, it may be safe to swim while it continues to clear up.

    3. How do I fix a green pool?

    To fix a green pool, you'll need to shock the pool, clean the tiles, filters, and equipment, and balance the water parameters. It may take a few days for the water to become clear.

    4. How do I keep my pool clear and balanced?

    To keep your pool clear and balanced, you can:

    Follow the tips in our complete Pool Maintenance Guide.
    Use ARM & HAMMER™ Clear Balance Pool Maintenance Tablets weekly to maintain stable pH and alkalinity levels.
    Keep a bag of ARM & HAMMER™ Baking Soda for pool maintenance with your pool chemicals to increase the alkalinity and pH of your pool water, or for spot algae scrubbing when needed.

    Now that you know how to fix green pool water and maintain a crystal-clear pool, you can enjoy a refreshing swim all season long!
    >>> See more Is LED Light Really Good for Your Eyes? A Comprehensive Analysis at: https://www.flickr.com/photos/bestledlightstripsblls/53090932435
    What Causes Green Pool Water & How to Fix It Is your pool water turning green? Don't worry, you're not alone. Green pool water can be a frustrating problem for any pool owner. Fortunately, there are several factors that can cause the water to turn green, and solutions to fix it. >>> See more Eye-Safe Lighting - Understanding the Effects of LED Light at: https://band.us/band/90424574/post/16 Understanding Green and Cloudy Pool Water If your pool water is both green and cloudy, it's likely an issue with algae. Algae can persist in a pool even after shocking it. A green pool, especially one that turned green overnight or after heavy rain, can also be caused by a pool pump not circulating water properly or a problem with your filtration system. Green Tint, but Clear Pool Water If your pool water has a green tint but is otherwise clear, it could be due to pollen, chlorine-resistant algae, or most commonly, a high pH level. When a pool's pH level exceeds 7.8, even high levels of chlorine cannot disinfect it effectively. This leads to metals in the water and pool components oxidizing, resulting in a greenish hue. How to Fix a Green Pool In most cases, you can fix a green pool by shocking it. To properly clean green pool water, you'll need to thoroughly clean the pool tiles, filters, and equipment, add shock treatment and algaecides, and balance the pool water. The entire process of fixing a green pool usually takes a few days. >>> See more The fascination with LED lights at: https://hub.docker.com/r/bestledlightstripsblls/are-led-lights-bad-for-eyes Follow these steps to know how to fix a cloudy green pool: Test and balance the pool water again. Pay special attention to the pH, alkalinity, and chlorine/disinfectant levels. Low chlorine levels will lead to future algae growth and the return of a green pool. Remember that properly balanced pH and alkalinity levels ensure that your chlorine can work as it should. Monitor your pool water daily. Ensure that your chlorine levels are adequate. Consider adding ARM & HAMMER™ Clear Balance™ Pool Maintenance Tablets to your pool care routine to help maintain balanced pH and alkalinity levels and support your chlorine. If you're wondering if you can swim in a green pool, it depends, but probably not. Dark, cloudy green pool water indicates an algae infestation, bacterial contamination, and compromised filtration. If your pool water is green, murky, or slimy, it's best to avoid swimming in it. If you're working hard to clean your green pool but it still has a greenish tint, test your pool water for bacteria, chlorine, and pH levels. If they're within normal limits and you only have patches of algae or a light green tint, it may be safe to swim in the water while it continues to clear up. Frequently Asked Questions 1. Why is my pool water green? Pool water can turn green due to algae overgrowth, low chlorine levels, a pH level higher than 7.8, excessive pollen in the water, poor water circulation, a malfunctioning filter, or a combination of these factors. 2. Can I swim in a green pool? It depends on the condition of the pool water. If the water is green, cloudy, or slimy, it's best to avoid swimming in it. However, if the water only has a slight green tint and the water parameters are within normal limits, it may be safe to swim while it continues to clear up. 3. How do I fix a green pool? To fix a green pool, you'll need to shock the pool, clean the tiles, filters, and equipment, and balance the water parameters. It may take a few days for the water to become clear. 4. How do I keep my pool clear and balanced? To keep your pool clear and balanced, you can: Follow the tips in our complete Pool Maintenance Guide. Use ARM & HAMMER™ Clear Balance Pool Maintenance Tablets weekly to maintain stable pH and alkalinity levels. Keep a bag of ARM & HAMMER™ Baking Soda for pool maintenance with your pool chemicals to increase the alkalinity and pH of your pool water, or for spot algae scrubbing when needed. Now that you know how to fix green pool water and maintain a crystal-clear pool, you can enjoy a refreshing swim all season long! >>> See more Is LED Light Really Good for Your Eyes? A Comprehensive Analysis at: https://www.flickr.com/photos/bestledlightstripsblls/53090932435
    0 Comments 0 Shares

  • 12V LED strip lights have become a popular choice for illuminating various spaces due to their versatility and customizable features. Among the myriad options available, the BSOD LED Light product line stands out for its remarkable offerings. In this review, we delve into the world of 12V LED strip lights, exploring how they revolutionize lighting design and enhance the ambiance of our surroundings.
    In today's fast-paced world, lighting plays a crucial role in setting the desired atmosphere and elevating the aesthetic appeal of our living and working environments. LED strip lights have emerged as a go-to lighting solution, offering endless possibilities for creative and personalized lighting designs.
    BSOD LED Light's product line embodies the essence of innovation and efficiency, providing users with high-quality LED strip lights that meet their diverse lighting needs. Whether you're looking to add ambient lighting to your home, highlight architectural features, or create dynamic visual effects, BSOD LED Light offers a range of options to suit every preference.
    One of the key advantages of BSOD LED Light's 12V LED strip lights is their ease of installation and flexibility. These lights can be easily mounted on various surfaces, allowing for seamless integration into any space. Additionally, with customizable features such as color temperature and brightness control, users have the freedom to create tailored lighting designs that enhance the ambiance of their surroundings.
    Furthermore, BSOD LED Light's commitment to quality and durability ensures that their LED strip lights provide long-lasting performance and reliability. With energy-efficient LED technology, users can enjoy significant energy savings without compromising on lighting quality.
    In conclusion, BSOD LED Light's 12V LED strip lights offer a versatile and efficient lighting solution for both residential and commercial applications. With their innovative features, ease of installation, and superior performance, these LED strip lights are a valuable addition to any lighting design project, providing users with endless possibilities to transform their spaces with captivating illumination.
    >>> See more Review about 12v Led Strip Lights: BSOD Led Light at: https://band.us/band/90424574/post/10

    The BSOD LED Light stands out as an exceptional lighting solution, offering a plethora of features and functionalities suitable for both practical and decorative purposes, especially in outdoor settings. Boasting an impressive IP68-Highend-Waterproof rating, this LED light strip ensures durability and reliability even in challenging environments.
    A standout feature of the BSOD LED Light is its vibrant RGB color options, featuring 300 light sources that deliver a stunning display of colors. Whether it's for festive occasions like Christmas, celebratory events such as graduations, or casual gatherings like birthday parties, these LED lights elevate the ambiance and create a vibrant atmosphere.
    Convenience is key with the BSOD LED Light, as it comes equipped with a user-friendly remote control and an app-based control method. This allows for effortless adjustment of lighting settings, including color selection, brightness levels, and lighting modes, all with a simple touch of a button.
    >>> See more Review about 12v Led Strip Lights: HitLights LED Strip Lights at: https://biztime.com.vn/post/765309_review-about-12v-led-strip-lights-hitlights-led-strip-lights.html

    Moreover, with a power source of 12 Volts and a low wattage of 5 watts, the BSOD LED Light ensures energy efficiency without compromising on performance. The corded electric power source guarantees a stable and consistent power supply for prolonged use.
    Crafted from high-quality materials like silicone and PVC rubber, this LED light strip offers both durability and flexibility. Its 16.4-foot length provides ample coverage for various lighting projects, while the IP68-Highend-Waterproof rating ensures resilience against outdoor elements.
    Whether it's illuminating your patio, enhancing safety on your boat, or creating a magical ambiance in your garden, the BSOD LED Light is up to the challenge. Its modern design seamlessly integrates into any environment, offering a stylish and contemporary lighting solution.
    In summary, the BSOD LED Light is a remarkable lighting solution that lives up to its promises. With its waterproof design, vibrant RGB colors, convenient control options, and energy-efficient performance, it offers a versatile and captivating lighting experience. Whether you're looking to enhance your outdoor space, celebrate special occasions, or add ambiance to your surroundings, the BSOD LED Light is a dependable and stylish choice.
    >>>See more Review Battery Powered LED Strip Lights: Echosari LED Light at: https://hub.docker.com/r/bestledlightstripsblls/review-about-12v-led-strip-lights-cleiscry-led-strip-light
    12V LED strip lights have become a popular choice for illuminating various spaces due to their versatility and customizable features. Among the myriad options available, the BSOD LED Light product line stands out for its remarkable offerings. In this review, we delve into the world of 12V LED strip lights, exploring how they revolutionize lighting design and enhance the ambiance of our surroundings. In today's fast-paced world, lighting plays a crucial role in setting the desired atmosphere and elevating the aesthetic appeal of our living and working environments. LED strip lights have emerged as a go-to lighting solution, offering endless possibilities for creative and personalized lighting designs. BSOD LED Light's product line embodies the essence of innovation and efficiency, providing users with high-quality LED strip lights that meet their diverse lighting needs. Whether you're looking to add ambient lighting to your home, highlight architectural features, or create dynamic visual effects, BSOD LED Light offers a range of options to suit every preference. One of the key advantages of BSOD LED Light's 12V LED strip lights is their ease of installation and flexibility. These lights can be easily mounted on various surfaces, allowing for seamless integration into any space. Additionally, with customizable features such as color temperature and brightness control, users have the freedom to create tailored lighting designs that enhance the ambiance of their surroundings. Furthermore, BSOD LED Light's commitment to quality and durability ensures that their LED strip lights provide long-lasting performance and reliability. With energy-efficient LED technology, users can enjoy significant energy savings without compromising on lighting quality. In conclusion, BSOD LED Light's 12V LED strip lights offer a versatile and efficient lighting solution for both residential and commercial applications. With their innovative features, ease of installation, and superior performance, these LED strip lights are a valuable addition to any lighting design project, providing users with endless possibilities to transform their spaces with captivating illumination. >>> See more Review about 12v Led Strip Lights: BSOD Led Light at: https://band.us/band/90424574/post/10 The BSOD LED Light stands out as an exceptional lighting solution, offering a plethora of features and functionalities suitable for both practical and decorative purposes, especially in outdoor settings. Boasting an impressive IP68-Highend-Waterproof rating, this LED light strip ensures durability and reliability even in challenging environments. A standout feature of the BSOD LED Light is its vibrant RGB color options, featuring 300 light sources that deliver a stunning display of colors. Whether it's for festive occasions like Christmas, celebratory events such as graduations, or casual gatherings like birthday parties, these LED lights elevate the ambiance and create a vibrant atmosphere. Convenience is key with the BSOD LED Light, as it comes equipped with a user-friendly remote control and an app-based control method. This allows for effortless adjustment of lighting settings, including color selection, brightness levels, and lighting modes, all with a simple touch of a button. >>> See more Review about 12v Led Strip Lights: HitLights LED Strip Lights at: https://biztime.com.vn/post/765309_review-about-12v-led-strip-lights-hitlights-led-strip-lights.html Moreover, with a power source of 12 Volts and a low wattage of 5 watts, the BSOD LED Light ensures energy efficiency without compromising on performance. The corded electric power source guarantees a stable and consistent power supply for prolonged use. Crafted from high-quality materials like silicone and PVC rubber, this LED light strip offers both durability and flexibility. Its 16.4-foot length provides ample coverage for various lighting projects, while the IP68-Highend-Waterproof rating ensures resilience against outdoor elements. Whether it's illuminating your patio, enhancing safety on your boat, or creating a magical ambiance in your garden, the BSOD LED Light is up to the challenge. Its modern design seamlessly integrates into any environment, offering a stylish and contemporary lighting solution. In summary, the BSOD LED Light is a remarkable lighting solution that lives up to its promises. With its waterproof design, vibrant RGB colors, convenient control options, and energy-efficient performance, it offers a versatile and captivating lighting experience. Whether you're looking to enhance your outdoor space, celebrate special occasions, or add ambiance to your surroundings, the BSOD LED Light is a dependable and stylish choice. >>>See more Review Battery Powered LED Strip Lights: Echosari LED Light at: https://hub.docker.com/r/bestledlightstripsblls/review-about-12v-led-strip-lights-cleiscry-led-strip-light
    0 Comments 0 Shares
  • Key Contrasts Between Strip Lights and Rope Lights

    >>>See More Your Guide to Pool Lights: Info for a Radiant Pool at: https://www.pinterest.com/pin/934496991415438997/

    When browsing for lighting options for your residence, you may encounter both strip and rope lights and wonder about their primary disparities. Although they may appear similar - featuring rows of lights instead of a single primary light source like a bulb - they are distinct from each other. It's crucial to grasp these differences as they will impact your decision on which one to opt for in your home.

    Strip lights are designed to serve as permanent fixtures, whereas rope lights are intended for temporary use, making them well-suited for outdoor applications or in rental properties. While strip lights typically offer greater brightness, the electrical components are more visible. Consequently, strip lights are most effective when installed in coving or beneath units where the strip itself remains concealed.

    Distinguishing Between Strip Lights and Rope Lights

    >>> See More Do LED Lights Damage Walls at: https://band.us/band/90424574/post/5

    As you explore lighting options for your home, you might encounter both strip lights and rope lights, prompting you to question their fundamental differences. Despite their superficial resemblance - both featuring rows of lights rather than a single bulb - they possess distinct characteristics. Understanding these disparities is essential as they will influence your decision regarding which type to choose for your residence.

    Strip lights are engineered to function as permanent fixtures, offering long-term illumination solutions. On the other hand, rope lights are designed for temporary use, rendering them particularly suitable for outdoor settings or rented properties. While strip lights generally provide higher brightness levels, the electrical components may be more visible. Consequently, strip lights are most effectively utilized when installed discreetly in coving or beneath units, where the strip itself remains concealed.

    >>> See More Which Adhesive Type Is Used On LED Strip Lights at: https://techhub.social/@bestledlightstripsblls/109998040501393579

    In contrast, rope lights are fully encased, with the wires connecting each light visible but devoid of visible circuitry. Therefore, having a rope light exposed is often more aesthetically pleasing.
    Key Contrasts Between Strip Lights and Rope Lights >>>See More Your Guide to Pool Lights: Info for a Radiant Pool at: https://www.pinterest.com/pin/934496991415438997/ When browsing for lighting options for your residence, you may encounter both strip and rope lights and wonder about their primary disparities. Although they may appear similar - featuring rows of lights instead of a single primary light source like a bulb - they are distinct from each other. It's crucial to grasp these differences as they will impact your decision on which one to opt for in your home. Strip lights are designed to serve as permanent fixtures, whereas rope lights are intended for temporary use, making them well-suited for outdoor applications or in rental properties. While strip lights typically offer greater brightness, the electrical components are more visible. Consequently, strip lights are most effective when installed in coving or beneath units where the strip itself remains concealed. Distinguishing Between Strip Lights and Rope Lights >>> See More Do LED Lights Damage Walls at: https://band.us/band/90424574/post/5 As you explore lighting options for your home, you might encounter both strip lights and rope lights, prompting you to question their fundamental differences. Despite their superficial resemblance - both featuring rows of lights rather than a single bulb - they possess distinct characteristics. Understanding these disparities is essential as they will influence your decision regarding which type to choose for your residence. Strip lights are engineered to function as permanent fixtures, offering long-term illumination solutions. On the other hand, rope lights are designed for temporary use, rendering them particularly suitable for outdoor settings or rented properties. While strip lights generally provide higher brightness levels, the electrical components may be more visible. Consequently, strip lights are most effectively utilized when installed discreetly in coving or beneath units, where the strip itself remains concealed. >>> See More Which Adhesive Type Is Used On LED Strip Lights at: https://techhub.social/@bestledlightstripsblls/109998040501393579 In contrast, rope lights are fully encased, with the wires connecting each light visible but devoid of visible circuitry. Therefore, having a rope light exposed is often more aesthetically pleasing.
    0 Comments 0 Shares
Sponsored

Sponsored


Don't forget, ads time: PentaVerge | AQU | Debwan | ICICTE | Nasseej | ESol | OUST | CorpSNet | PoemsBook | TopDeals | TheReaderView