QuickBooks Database is a program that enables you to give access to your database to more than one person in your workplace. This is useful if you are working in a team and want all of your team members to work on the same file at the same time. The program also enables you to share your files with your team members.
This is going to be a short post about database server manager and how to access the QuickBooks database.
Steps to install QuickBooks database server manager
The steps that need to be taken in order to install QuickBooks Database Server Manager are listed below.
- Download the QuickBooks Database Server Manager that is available online.
- After the file has been downloaded, you will need to install the QuickBooks Desktop application and configure a Database Server Manager on the computer that is going to act as the server for the files.
- Before beginning the installation, make sure that all of the program are closed, and then launch the Setup exe file, after which you should follow the instructions that appear on the screen.
- You can choose to install the software using the Custom or Network type, and then select the Next button. At this point, you need to make a decision regarding the type of installation that you require. it presents the opportunity to choose.
- Install both the Desktop version of QuickBooks and the QuickBooks Database Server Manager.
- Only Database Server Manager should be installed on the computer that will serve as the server.
- Click the Next button once you have selected the option that best suits your requirements. And make sure to follow all of the steps that are displayed on the screen in order to successfully install QuickBooks Desktop.
- Now what you need to do is give permission for QuickBooks Database Server Manager to run on your computer by letting the firewall and the antivirus software through.
Steps to use the QuickBooks database server manager
Following are the steps you need to follow while accessing the QuickBooks database server.
Step 1: Scan your folders

You need to look for the folders containing your files before sharing them. One scan is all that is required.
- Open the Windows Start menu on the server computer, which is where your company files are kept.
- The Database Server Manager will be opened after you type "Database" into the search bar.
- Navigate to the Scan Folders tab.
- To browse, click the folders that contain your company's files, and then choose them (QBW).
- At the conclusion, click OK.
- Pick Start Scan once you're prepared.
- Following the scan, the folders show up in the QuickBooks company files found section. These folders now enable other computers on your network to access the corporate files.
Step 2: Keep watch over your drives
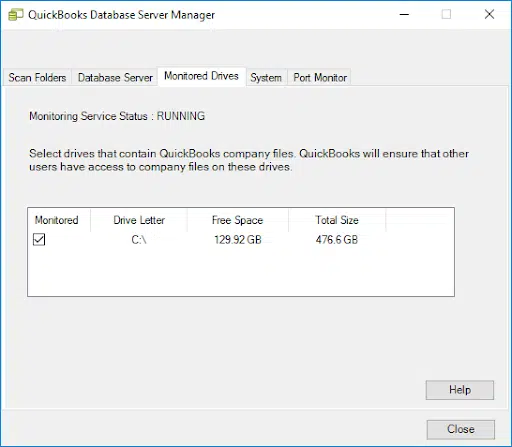
After you have scanned folders, the drives that contain the scanned folders will be displayed in the Monitored Drives tab. Choose the drive that will be used to track these folders. If you do it this way, you won't have to rescan the folders even if you end up reorganising the company files that are in them.
- Navigate to the Monitored Drives tab in the menu.
- Make sure the checkboxes next to the hard drives that hold your company's files are selected.
- You should only add drives on which your company's files are stored.